Access to your Payconiq payments at all times and wherever you happen to be.
How the merchant portal works
Get started with the merchant portal
You’ll receive an activation e-mail. In it, click on ‘Set password’.
In the activation email, sent to the email address you provided on your Payconiq contract, click on the "set password" link. You will then be redirected to the Merchant Portal website.


Haven’t received an activation e-mail? Visit portal.payconiq.com and click on ‘Forgotten password’. If you still don’t receive an e-mail, contact our helpdesk.
Choose is the merchant portal a password
A minimum of 10 characters long and contains at least one capital letter, one number and one special character (+, -*?).
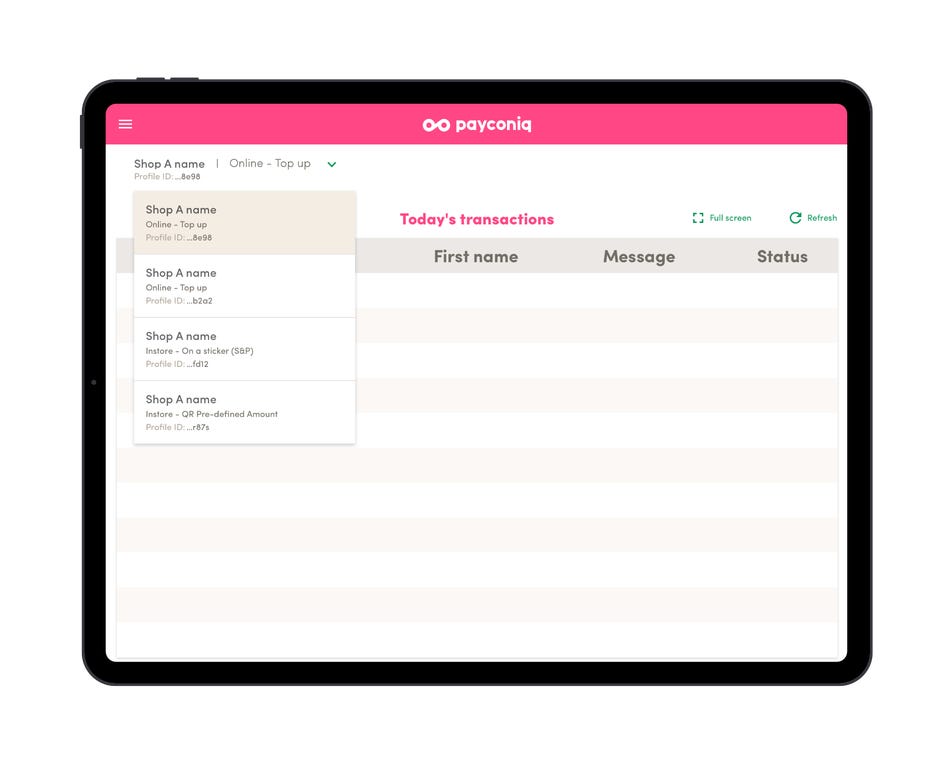
Select the shopping business or Payconiq product you want to have displayed on your landing page.
This is the information you see each time you log into the merchant portal. If you are only activating 1 business or 1 product, this step will automatically be skipped.
Make your own first test payment with your Payconiq app
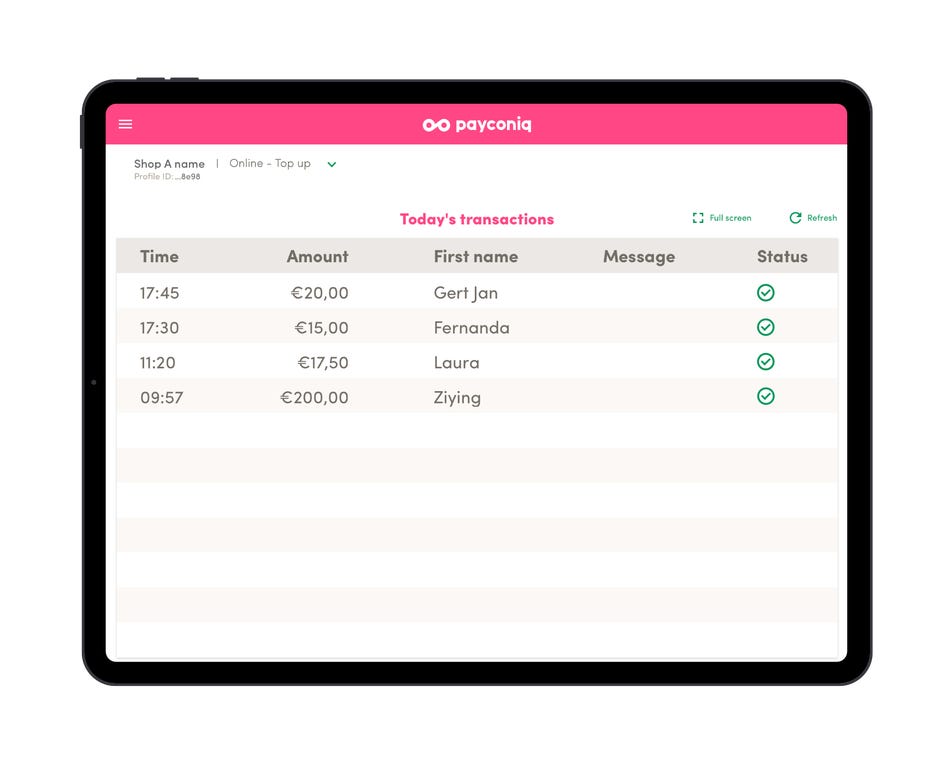
You will see the transaction appear immediately on the ‘Transactions Today’ page.
Don’t yet have an app that supports Payconiq on your smartphone? Install the Payconiq by Bancontact app (available for iOS and Android).
Transactions overview
Transactions today
This is where you will find a summary of all the transactions you have received today. If you have more than one sales business or use various Payconiq products, then use the arrow at the top to select the profile for which you wish to view the incoming transactions.

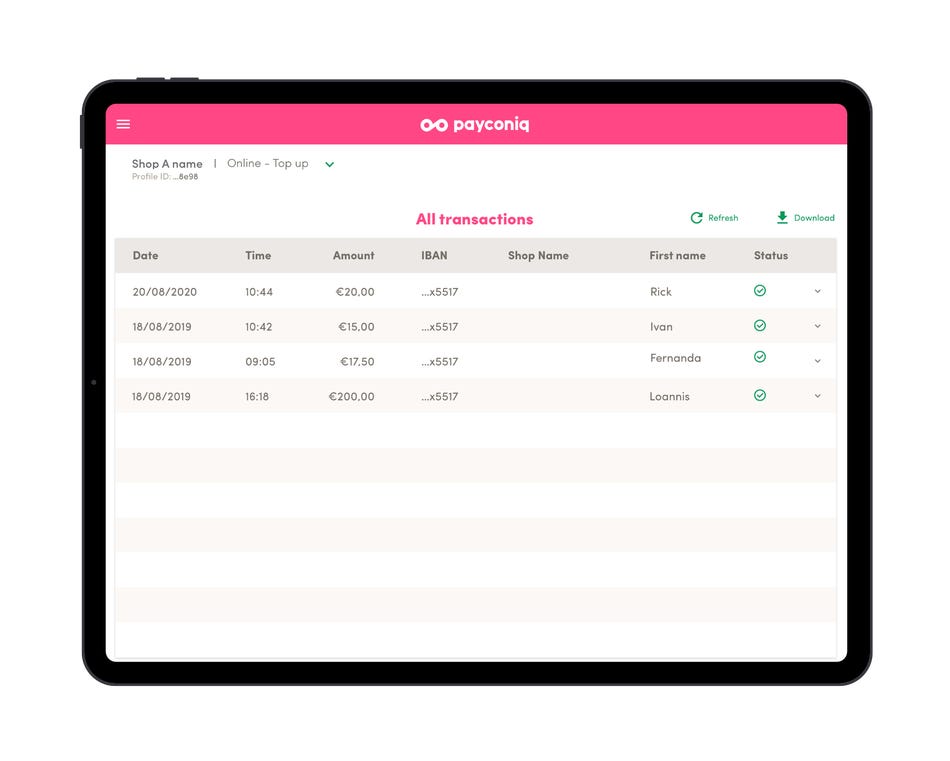
All transactions
View all transactions that you have received via Payconiq to date. As with ‘Transactions today’, you can also select the sales business or Payconiq product you want at the top.
Want to view more details for a specific transaction? Click on the arrow next to the transaction status.
Download transactions
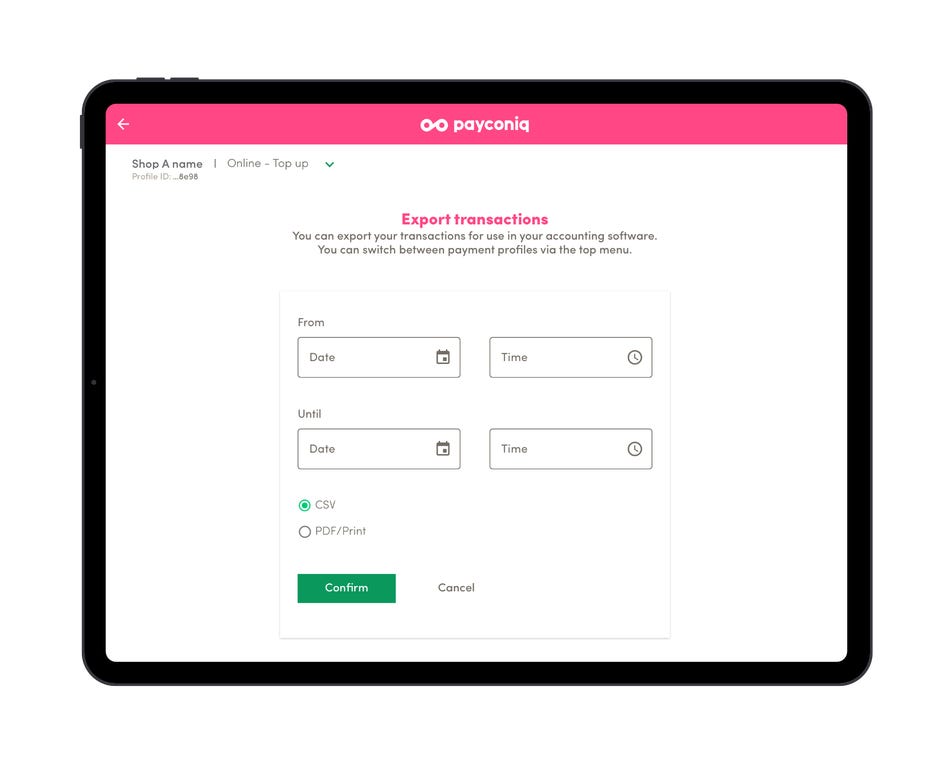
Use the download button at the top of the transaction list to export a transaction report to a pdf or Excel file.
You can filter transactions by date and time using the filter screen. If you only want to see the transactions for one sales business or for one specific Payconiq product, first select the right profile at the top of the page.
Totals
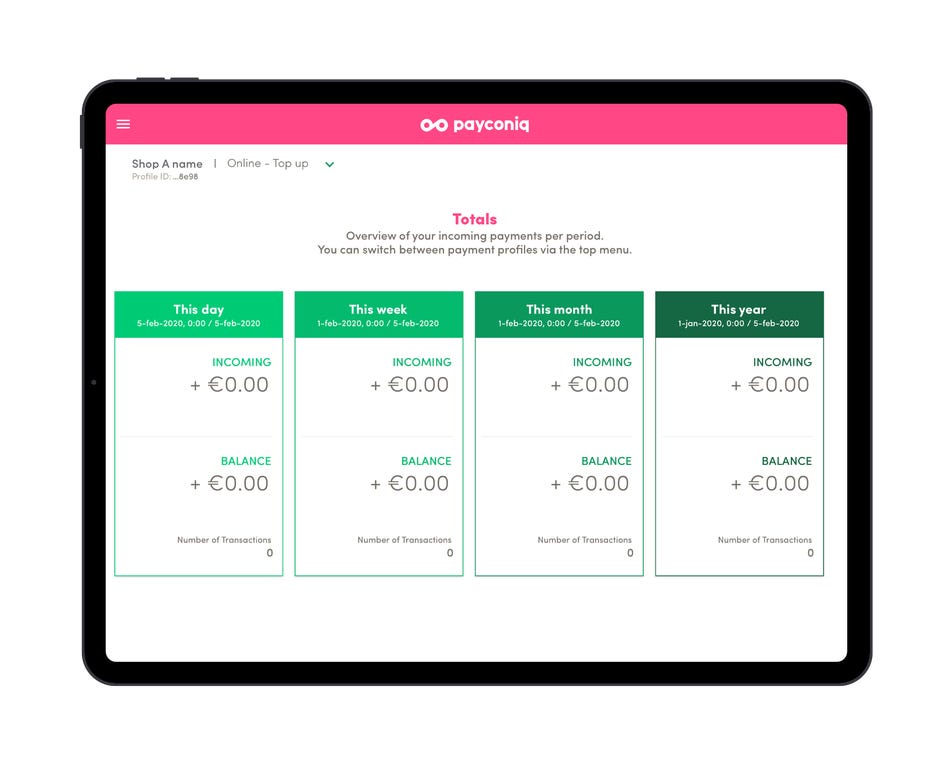
Check at a glance the total amount that you have received via Payconiq. Just what you need for closing the day! You can view the total amount for today, this week, this month or for last year.
Want a total overview of all your sales businesss or products together? Then click on ‘all payment profiles’ at the top.
Users
Adding additional users
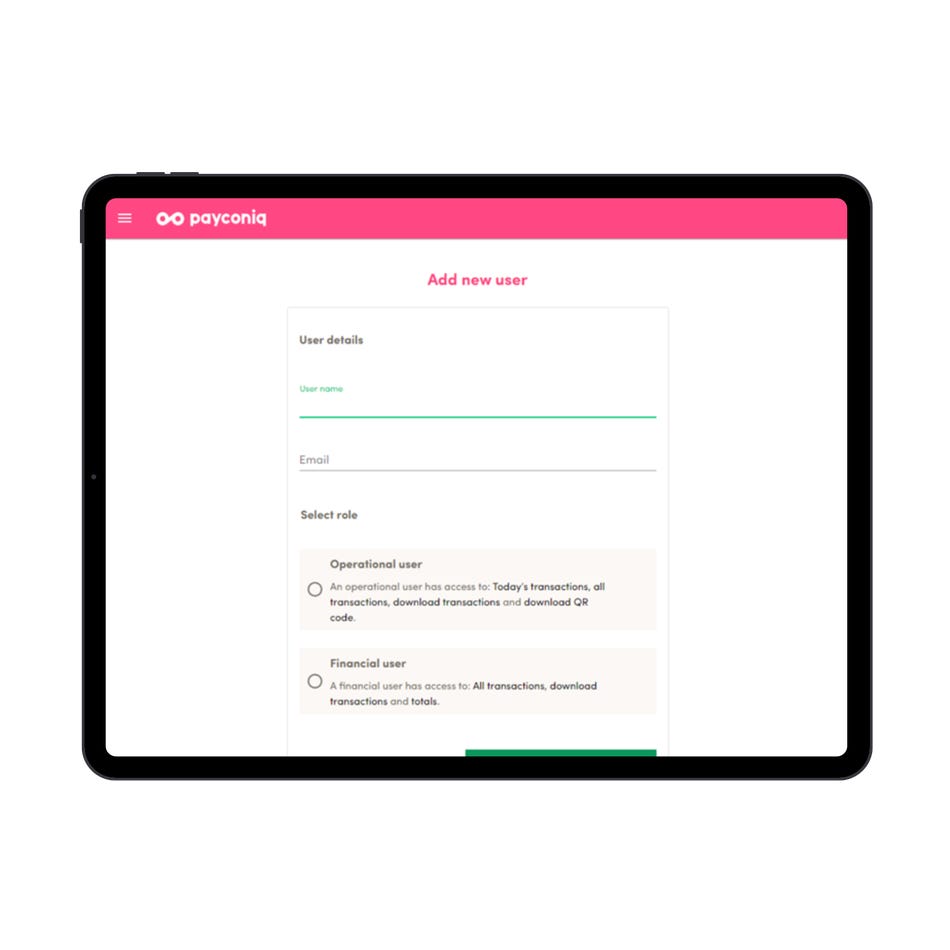
Click on 'users' in the navigation and then select 'new user' to grant access to additional individuals to your account.
If you wish to give limited access to an employee for transactions at one or more store locations or products, choose 'operational user' and select the applicable products for this employee.
If you are granting access to your accounting or employees responsible for reconciliation, choose 'financial user'.
Overview of users
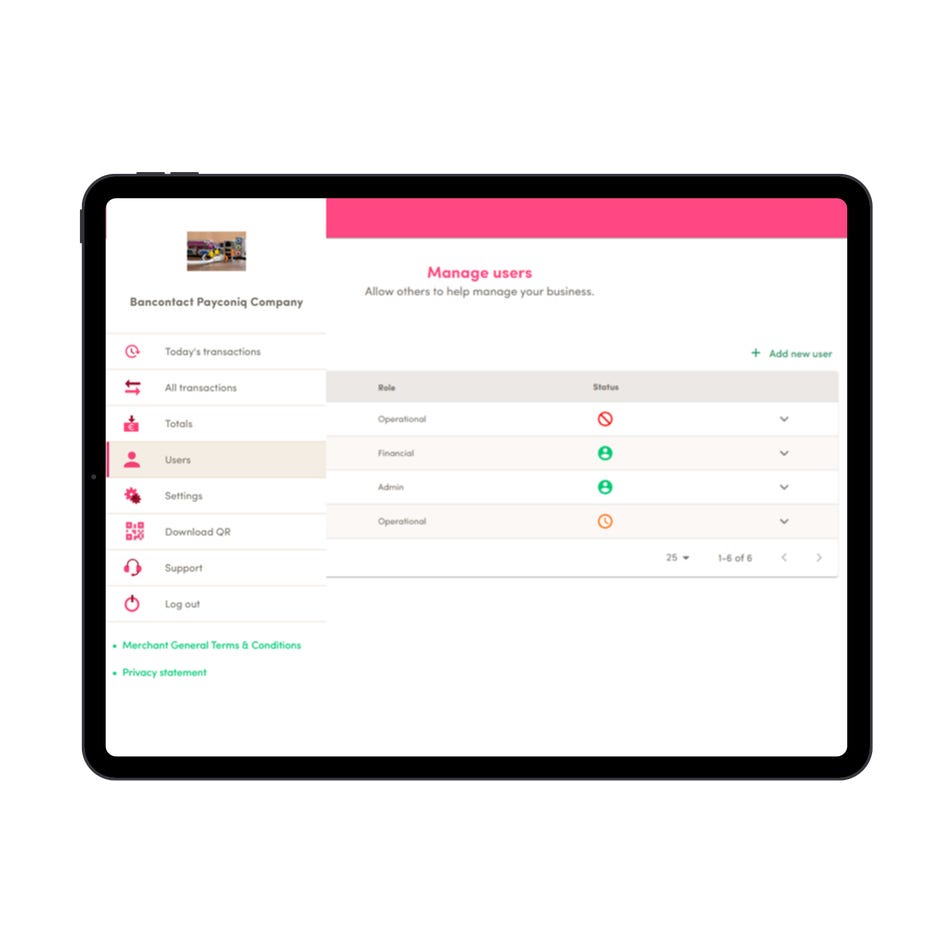
In the overview of all users, you can immediately see who has access to the portal.
A user who has been added and has already logged into the portal has an "active" status (green).
If you have added a user but they have not yet logged in, their status will be "pending" (orange). This person may not have received their email to set a password. You can resend it yourself by clicking "resend".
If you wish to deactivate a user, either temporarily or permanently, because they no longer need access, you can click "Deactivate". The user will then have a "disabled" status (red) and can be reactivated if needed.
Modify or delete users
To modify the profile of an employee, select the user profile and choose "edit" to adjust the user's access or name. Please note that the email address of a user cannot be modified; you will need to create a new user for that purpose.

Settings
Settings
Choose which language you want for the merchant portal: Dutch, French, German or English.
It is also possible for a little sound to play each time a new, successful transaction comes in. To activate this feature, tick ‘Beep sound’ on the right-hand side.

The Payconiq toolbox
How can we help?
Looking to group payments? Need help with your CODA statement? Got questions regarding setup? We're here to assist you with all your queries.

Promotional material
How do you let your customers know that you accept Payconiq? Read our helpful tips and download promotional materials to boost mobile payments.

Merchant portal
Payconiq provides a range of options. Discover how you can easily track incoming payments, download transaction lists, and much more.

For developers
Integrate Payconiq into your payment system yourself or handover the required information to your current provider.


 Log in to your merchant portal or find out how it works | Payconiq Professional